-
Je winkelmandje is leeg
Ga naar de shop om producten in je winkelwagen te plaatsen
Lockpick Inspiration blogs
Want to learn lockpicking? With the right lockpick set and our English guides, you can open your first lock within a few hours. Whether you choose a lockpicking set for beginners or professional lockpick tools, in our articles you will learn all the techniques step by step.
Jump to:

The Unpickable Lock
20 April 2026
Are there locks that really can't be picked? We examine the latest attempt by YouTuber Works By Design, along with previous attempts by Stuff Made Here and Andy Pugh....
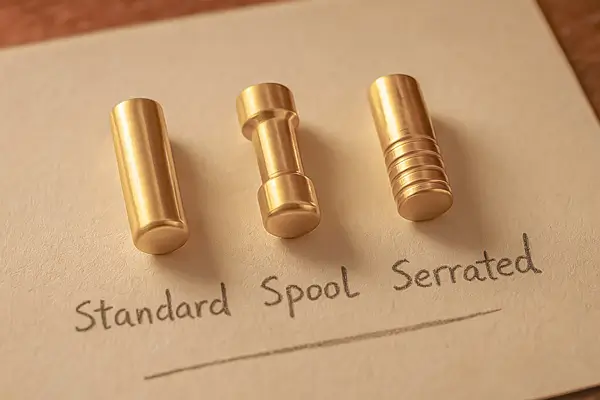
Security Pins in Lockpicking
7 April 2026
Security pins such as spool, serrated, and mushroom pins make lockpicking significantly more difficult. In this article, you will learn how to recognize these security pins, what a false...

What Types of Locks Are There?
20 January 2026
Discover which types of locks you encounter in Europe: from padlocks and profile cylinders to oval cylinders, knob cylinders, interchangeable cores, and wall or mortise locks. This guide explains...
The real costs of a locksmith in 2026
13 January 2026
What does a locksmith really cost in 2026? In this article, we discuss the fair rates for opening a closed door, how to recognize fraudulent locksmiths by warning signs,...
Why you should polish your new lockpick set (and how I do it)
12 December 2025
New lockpick sets come straight from the factory with sharp edges and burrs, even from expensive brands. In this article, I explain why polishing is essential and how to...
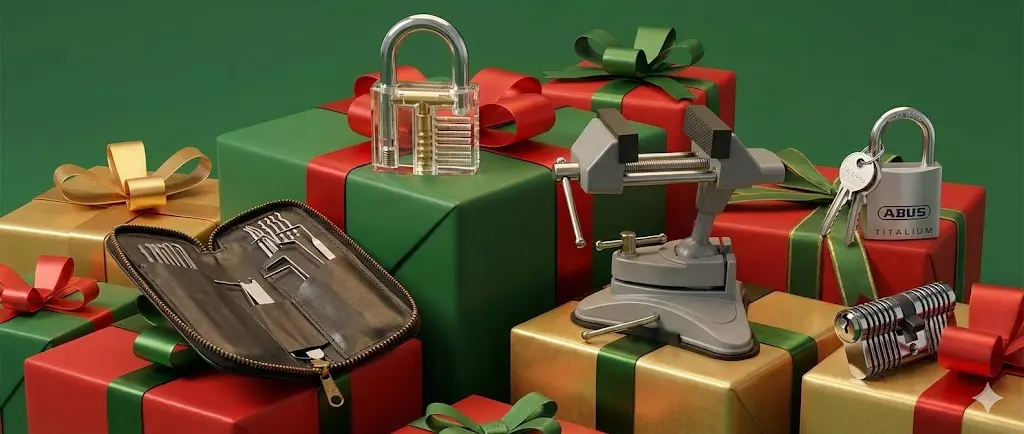
Lockpick Gift Guide Christmas 2025: The Best Gifts for Hobbyists
10 December 2025
Looking for the perfect Christmas gift for a lockpick enthusiast? In this guide, I discuss the best lockpick sets and practice locks for both beginners and advanced hobbyists, including...

Advice on Buying Your First Lockpick Set for Beginners
3 December 2025
Buying your first lockpick set can be overwhelming with all the brands and options available. In this article, I share my personal advice on which set is best for...

Spy Gadgets that Russia doesn’t want to share with you
3 December 2025
Physical security and spy tools surprisingly often go hand in hand. In this article, we look at a number of compact spy gadgets and hidden lockpick tools that are...

Challenge Locks: The Lockpicking Game Among Friends
20 November 2025
Challenge locks are locks specifically equipped with extra security pins to challenge lockpickers. In this article, you will discover how this popular game among lockpicking enthusiasts works, which techniques...
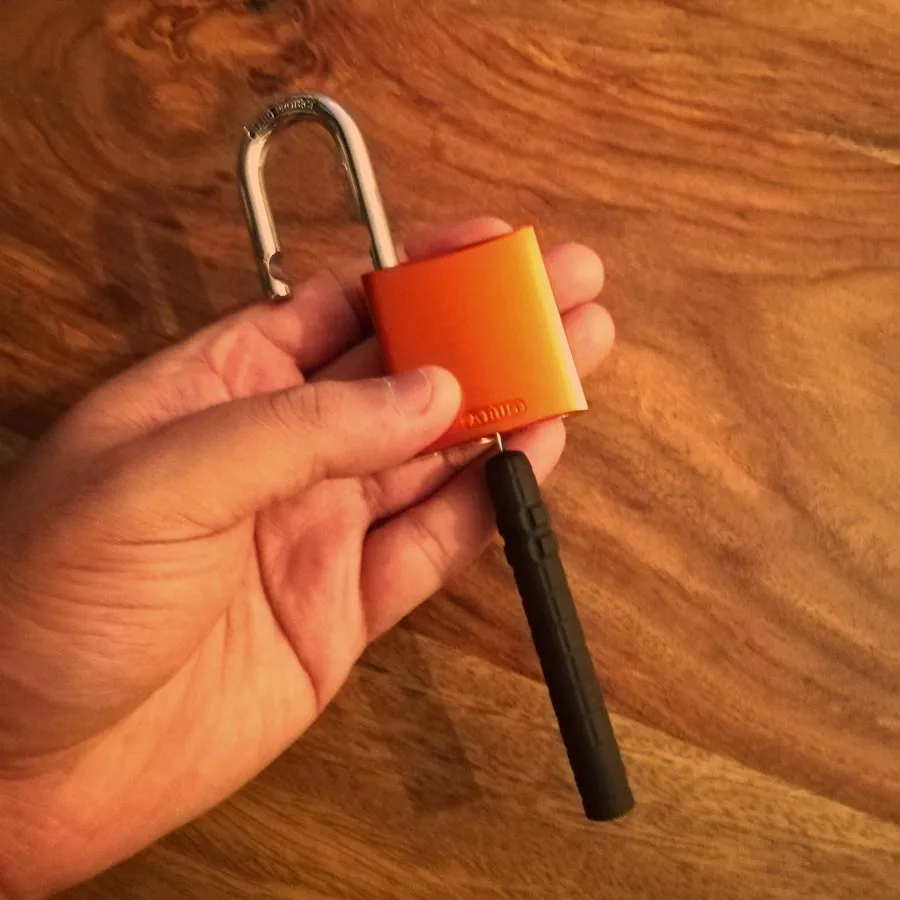
ABUS Bypass Driver – Open ABUS 72/40 Padlock
31 October 2025
The ABUS 72/40 is a popular padlock, but it has a notable weakness: the Bypass Driver technique. In this article, I will explain step by step how this bypass...

Survival Tips from Lockpickings
27 October 2025
Lockpicking is more than a hobby; it is also a valuable skill for self-reliance. In this article, we combine lockpicking with practical survival techniques: how to find drinking water,...

What is Core Pull Protection?
23 October 2025
Core pull protection safeguards your door lock against a specific burglary technique where the cylinder core is forcibly pulled out of the lock. In this article, we explain how...